%20(1)%20(1)%20(1).png)
In today's digital world, users expect applications to be interactive and responsive. Real-time web applications allow users to receive instant updates and interact with each other seamlessly. These applications depend on continuous data exchange between servers and clients, which is where WebSockets come into play.
WebSockets are protocols that allow two-way communication between a client and a server. Combining the Rails framework with WebSockets using Action Cable, developers can easily create powerful, real-time applications.
This article will guide you through the process of setting up WebSockets in Rails to build a real-time web application. By the end, you'll have a functional example that shows the advantages of using WebSockets with Rails.
Table of Contents
- What are WebSockets?
- Why use WebSockets to build real-time web applications?
- Using WebSockets in Rails apps with Action Cable
- Step-by-Step tutorial for building a real-time Rails application with WebSockets
- Conclusion
What are WebSockets
WebSockets are protocols that allow bidirectional communication between a client (such as a web browser) and a server. Unlike traditional HTTP requests, which are unidirectional, WebSockets allow both the client and server to send and receive data in real time.
How WebSockets Work
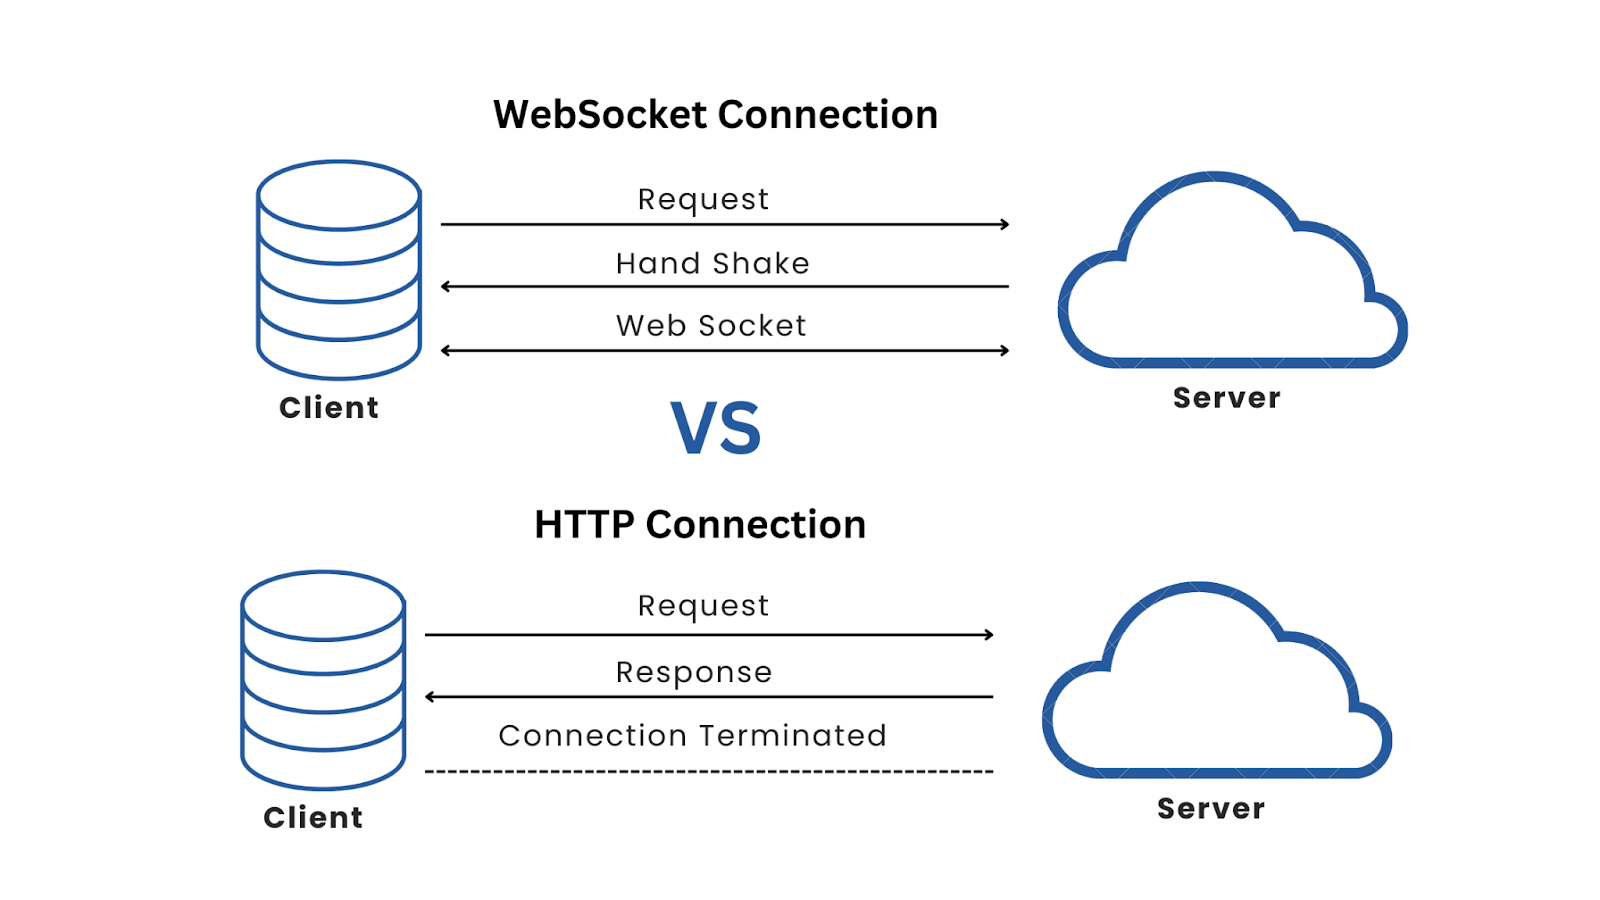
WebSockets use an initial handshake request to establish a persistent connection between the client and server. Once the WebSockets connection is established, the client and the server can exchange data continuously over the same connection.
Traditional HTTP vs. WebSockets
Traditional HTTP operates on a request-response model. A client sends a request to the server, which processes the request and sends a response. This connection is then closed. On the other hand, WebSockets established a persistent, bidirectional connection between the client and server and exchanged data in both directions without needing constant requests.
Advantages of WebSockets Over Traditional HTTP Requests
This comparison of the advantages of using WebSockets over traditional HTTP requests highlights the efficiency and scalability that WebSockets bring to real-time applications.
Why Use WebSockets to Build Real-time Web Applications?
WebSockets eliminate the need for additional HTTP requests and use bidirectional communication, resulting in faster communication between the client and the server. They are scalable, as the number of connections does not impact server performance. This makes WebSockets a perfect fit for real-time applications, such as chat apps, live updates, and instant notifications.
Using WebSockets in Rails Apps with Action Cable
To integrate WebSockets into the Rails application, we use Action Cable, a built-in framework provided by Rails.
Action Cable integrates WebSockets with Rails, providing both the server-side (Ruby) and client-side (JavaScript) components needed to handle WebSocket connections.
Action Cable Components
- Connections: Connections represent the WebSocket connection between the client and server. When a client connects to the server, a connection object is created to manage the communication between the client and server.
- Channels: Action Cable organizes WebSocket connections into channels. Each channel represents logical communication between the client and the server.
- Subscriptions: Subscriptions represent the client's subscription to a channel. When a client subscribes to a channel, subscriptions manage the data flow to and from the client.
How Action Cable Works
Action Cable starts the process by establishing a WebSocket connection when a client connects to the server. The client can then subscribe to one or more channels, each creating a channel instance on the server.
This allows the server to broadcast messages to all subscribers of a channel to ensure that clients receive these broadcasts in real time and can also send messages back to the server.
Step-by-Step Tutorial for Building a Real-Time Rails Application with WebSockets
Creating a real-time web application involves multiple steps, including setting up the Rails backend, creating channels for WebSocket communication, and configuring a front-end client.
Below, we'll begin by setting up the Rails application, followed by creating channels, configuring the Vite client, and finally integrating the WebSocket connection to provide real-time functionality.
Step 1: Set up the Rails Application
Create a new Rails Application.
First, let's create a new Rails application with the necessary dependencies. To do this, open your terminal and execute the following commands:
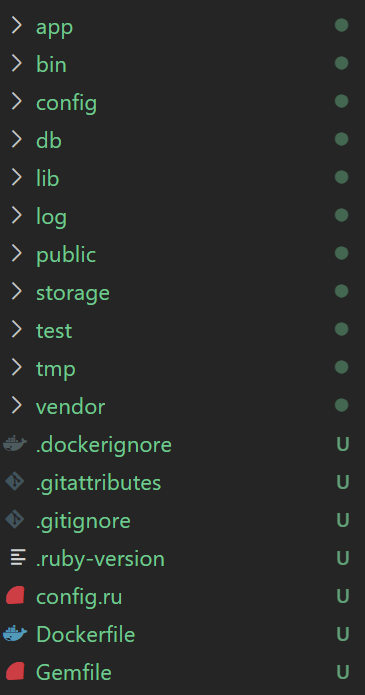
rails new websocket_applicationOnce the application is created, navigate into the project directory with:
cd websocket_applicationThe directory structure of your new Rails application will look like this:
Generate a channel and controller.
Next, generate the necessary components for WebSocket communication and a basic page.
rails g channel alerts
rails g controller pages home
The first command generates an AlertsChannel for handling WebSocket messages. The second command creates a PagesController with a home action and view.
Defining Routes
Update config/routes.rb file to define the necessary routes:
Rails.application.routes.draw do
  resources :posts
  get 'pages/home'
# Defines the root path route ("/")
  post "/hello", to: "pages#hello"
  root "pages#home"
end
Creating Page Controller
Update app/controllers/pages_controller.rb file to implement the hello action to broadcast a message:
class PagesController < ApplicationController
  def hello
    ActionCable.server.broadcast 'AlertsChannel', "Hello from Bluelight."
  end
end
This action sends a broadcast message to all clients subscribed to the AlertsChannel.
Creating the Pages Home View
Update app/views/pages/home.html.erb file and add a button to trigger the hello action:
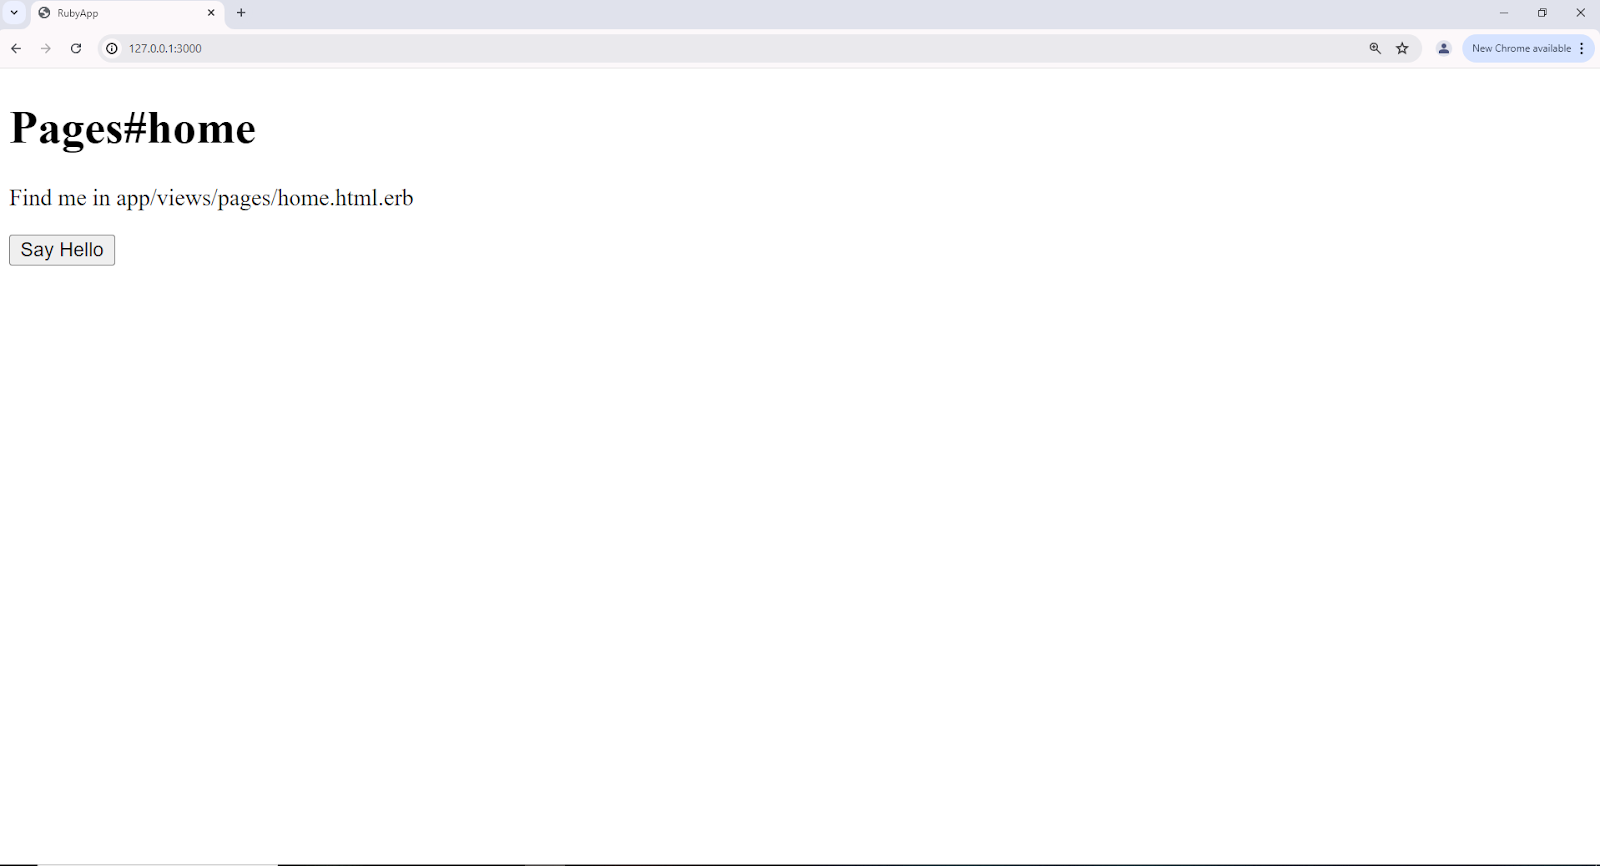
<%= button_to "Say Hello", hello_path %>This button sends a POST request to the /hello route, which triggers the hello action in the PagesController. When clicked, it broadcasts a message to the AlertsChannel.
Start the Rails Server
To start the Rails server, run:
rails sNavigate to http://localhost:3000 in your browser, and you will see something like this:
Step 2: Create The Alerts Channel
Creating the Alerts Channel with Action Cable
Update app/channels/alerts_channel.rb file, to define the channel:
class AlertsChannel < ApplicationCable::Channel
  def subscribed
    stream_from 'AlertsChannel'
  end
end
Step 3: Set Up the Vite Client
Create a New Vite Project for the Client-side Application
Open a new terminal and run the following command:
npm create vite@latestFollow the prompts to set up the project, for example:
- Project name: vite_project
- Select a framework: [Choose a suitable framework, e.g., Vanilla]
Once the Vite project is created, navigate into the project directory with the following:
cd vite_projectInstall Dependencies
To install the necessary packages, open the terminal and execute the following commands:
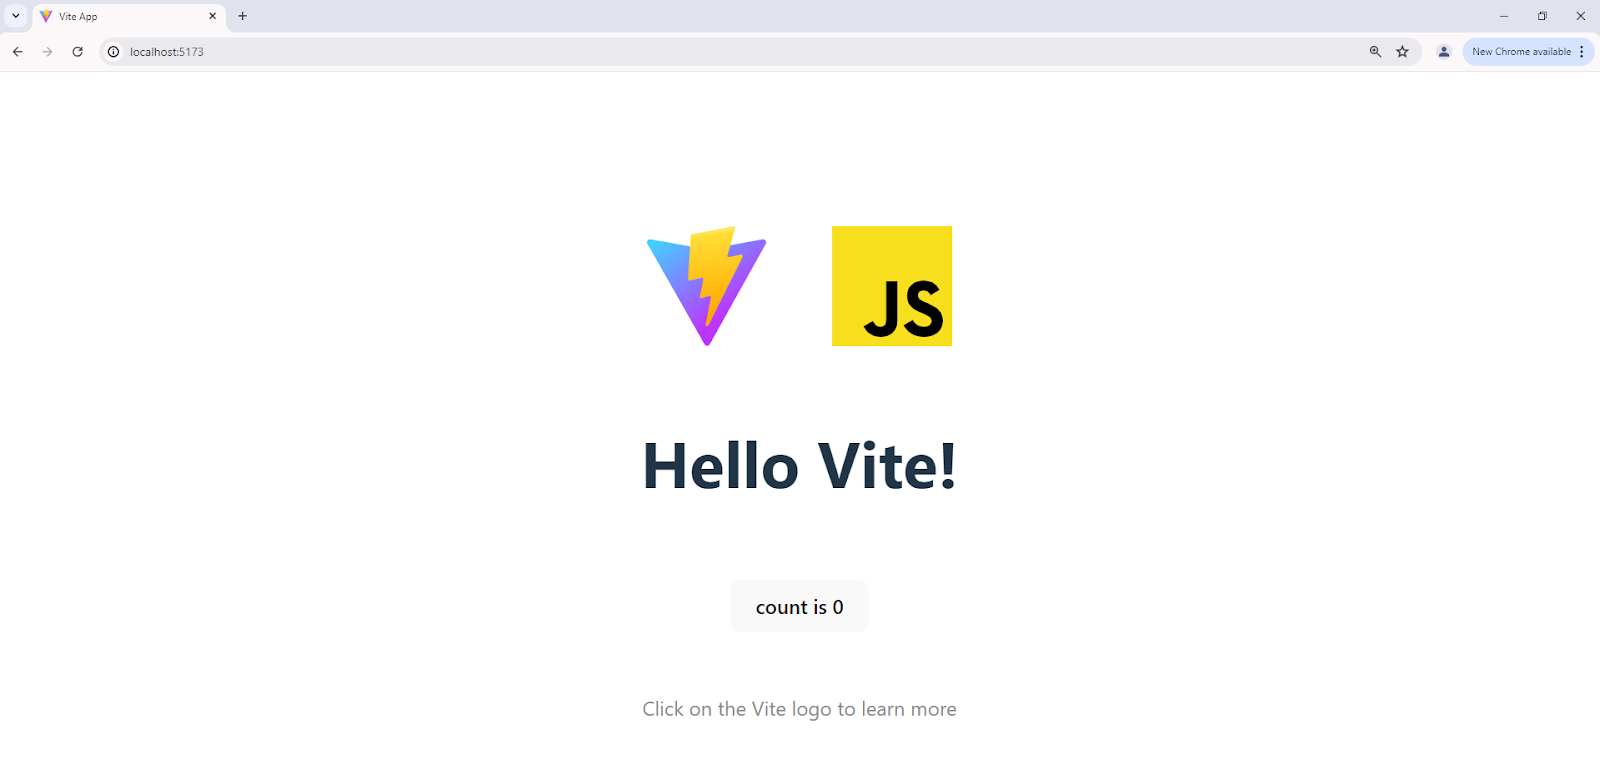
npm install
npm run dev
This starts the Vite application, accessible at http://localhost:5173/.
Step 4: Configure CORS
Add Rack-CORS to the gemfile.
In the Rails project, add the rack-cors gem. For that, open a terminal and run the following command:
bundle add rack-cors Creating a CORS Initializer to Allow Cross-Origin Requests
Create a new file named `cors.rb` in the `config/initializers` folder and add the following code:
Rails.application.config.middleware.insert_before 0, Rack::Cors do
    allow do
      origins '*'
      resource '*',
        headers: :any,
        methods: %i[get post put patch delete options head]
    end
  end
Step 5: Create the WebSocket Connection for the Client.
Connecting the Client to the Rails WebSocket Server
Locate the `main.js` file in the Vite project and clear its contents. Add the following WebSocket connection code to main.js:
function createSocket() {
  const socket_url = 'ws://localhost:3000/cable';
  const socket = new WebSocket(socket_url);


  socket.onopen = function(event) {
    console.log("Connected to the Rails server.");
    const msg = {
      command: "subscribe",
      identifier: JSON.stringify({


        id: 1,
        channel: 'AlertsChannel'
      })
    };
    socket.send(JSON.stringify(msg));
  };


  socket.onmessage = function(event) {
    const data = JSON.parse(event.data);


    if (data.type === 'ping') {
      return;
    }
    if (data.message) {
      console.log(data.message);
    }
    console.log("Received data from server", event.data);
  };


  socket.onclose = function(event) {
    console.log("Disconnected from the server.");
  };


  socket.onerror = function(error) {
    console.log('WebSocket error observed:', error);
  };
}


createSocket();
This will establish a WebSocket connection to the Rails server and subscribe to the AlertsChannel. It handles various WebSocket events, such as receiving messages, errors, and connection closures.
Step 6: Integrate with the Rails Application
Broadcast messages from the Rails application to the client using an Action Cable.
To demonstrate real-time capabilities, let's broadcast a message whenever a new post is created.
Generate a scaffold for the post-model. For that, open a terminal and run the following command:
rails g scaffold Post title body:text
rails db:migrate
This command generates a scaffold for the Post model, including a controller, views, and database migration.
Update the PostsController to broadcast messages.
In the `posts_controller.rb` file located in the `app/controllers` folder, add the following code:
class PostsController < ApplicationController
  before_action :set_post, only: %i[ show edit update destroy ]


  # GET /posts or /posts.json
  def index
    @posts = Post.all
  end


  # GET /posts/1 or /posts/1.json
  def show
  end


  # GET /posts/new
  def new
    @post = Post.new
  end


  # GET /posts/1/edit
  def edit
  end


  # POST /posts or /posts.json
  def create
    @post = Post.new(post_params)


    respond_to do |format|
      if @post.save
        ActionCable.server.broadcast 'AlertsChannel', "Created a post from the Bluelight side with title: #{@post.title} and body: #{@post.body}"
        format.html { redirect_to post_url(@post), notice: "Post was successfully created." }
        format.json { render :show, status: :created, location: @post }
      else
        format.html { render :new, status: :unprocessable_entity }
        format.json { render json: @post.errors, status: :unprocessable_entity }
      end
    end
  end


  # PATCH/PUT /posts/1 or /posts/1.json
  def update
    respond_to do |format|
      if @post.update(post_params)
        format.html { redirect_to post_url(@post), notice: "Post was successfully updated." }
        format.json { render :show, status: :ok, location: @post }
      else
        format.html { render :edit, status: :unprocessable_entity }
        format.json { render json: @post.errors, status: :unprocessable_entity }
      end
    end
  end


  # DELETE /posts/1 or /posts/1.json
  def destroy
    @post.destroy!


    respond_to do |format|
      format.html { redirect_to posts_url, notice: "Post was successfully destroyed." }
      format.json { head :no_content }
    end
  end


  private
    # Use callbacks to share common setup or constraints between actions.
    def set_post
      @post = Post.find(params[:id])
    end


    # Only allow a list of trusted parameters through.
    def post_params
      params.require(:post).permit(:title, :body)
    end
end
This code broadcasts a message to the AlertsChannel whenever a new post is successfully created, providing real-time updates to all connected clients.
With all the components set up, you're ready to test the real-time functionality of your web application.
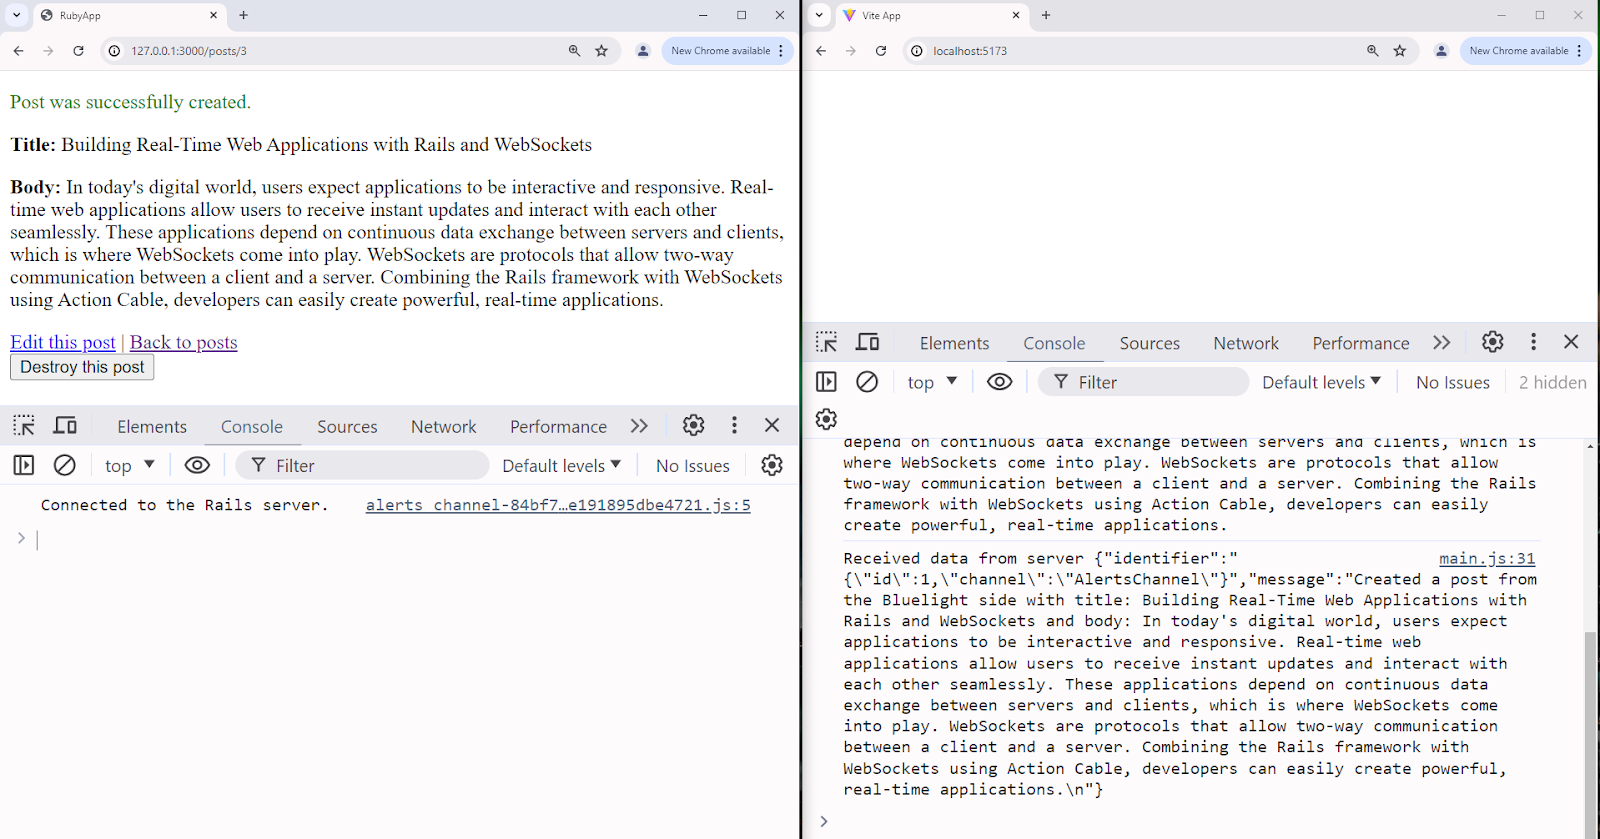
Open both the Rails app at http://localhost:3000/posts and the Vite client at http://localhost:5173 in your browser.
When you create a new post on the Rails app page, you'll see the post's text appear in the Vite client's console.
Conclusion
WebSockets allow developers to build bi-directional, persistent connections between a client and a server. In this article, we covered the important steps to set up WebSockets and their advantages over traditional HTTP requests. We also discussed how to use them in Rails to build real-time applications.
Using Action Cable, we created a bidirectional communication channel between the Rails server and the Vite client. Combining Rails and WebSockets through Action Cable provides a robust solution for developers to create responsive, dynamic applications that can update in real time without page refreshes.
More cost-effective than hiring in-house, with Nearshore Boost, our nearshore software development service, you can ensure your business stays competitive with an expanded team and a bigger global presence, you can be flexible as you respond to your customers’ needs.
Learn more about our services by booking a free consultation with us today!


