%20(1)%20(1)%20(1).png)
In recent years, the world of software applications has been revolutionized by containerization. Essentially, containerization allows developers to create and deploy applications faster and more securely unlike traditional methods where code is developed in a specific computing environment which, when transferred to a new location, often results in bugs and errors.
However, as you scale your applications up, you need some tooling to help automate the maintenance of those applications, facilitate the replacement of failed containers automatically, and manage the roll-out of updates and reconfigurations of those containers during their lifecycle. This is where container orchestration tools such as Amazon’s Elastic Container Service (AWS ECS) come in handy.
In this article, we explain how to run containers on AWS ECS, while outlining its main features and their core benefits.
Table of Contents
- What is containerization?
- What is AWS ECS?
- How to run Containers on AWS ECS: A step-by-step guide
- AWS ECS benefits and Comparison with other container orchestration tools
- Conclusion
What is Containerization?
Containerization refers to the packaging of an application with its dependencies, such as libraries and other binaries, into a single unit called a container. This ensures that the software or application within the container can be moved and run consistently in any environment and on any infrastructure, independent of that environment or the infrastructure’s operating system.
Typically, containers are lightweight, portable, and highly conducive to automation. This aspect explains why containerization has become a cornerstone of development pipelines and application infrastructure for various use cases.
What is AWS ECS?
Amazon Elastic Container Service (AWS ECS) is a highly functional container orchestration service offered by Amazon Web Services (AWS) designed to simplify the process of running containers at scale.
With AWS ECS, you can define your application and its required resources, and the service will take care of running, monitoring, and scaling across multiple compute options. Also, it has automatic integrations with other AWS services that your application may require. System operations such as creating custom scale and capacity rules, monitoring and querying application logs, as well as, telemetry data are also simplified.
How to Run Containers on AWS ECS: A Step-by-Step Guide
Prerequisites
AWS Command Line Interface (CLI) installed and configured
Docker installed on your local machine
Git installed on your local machine
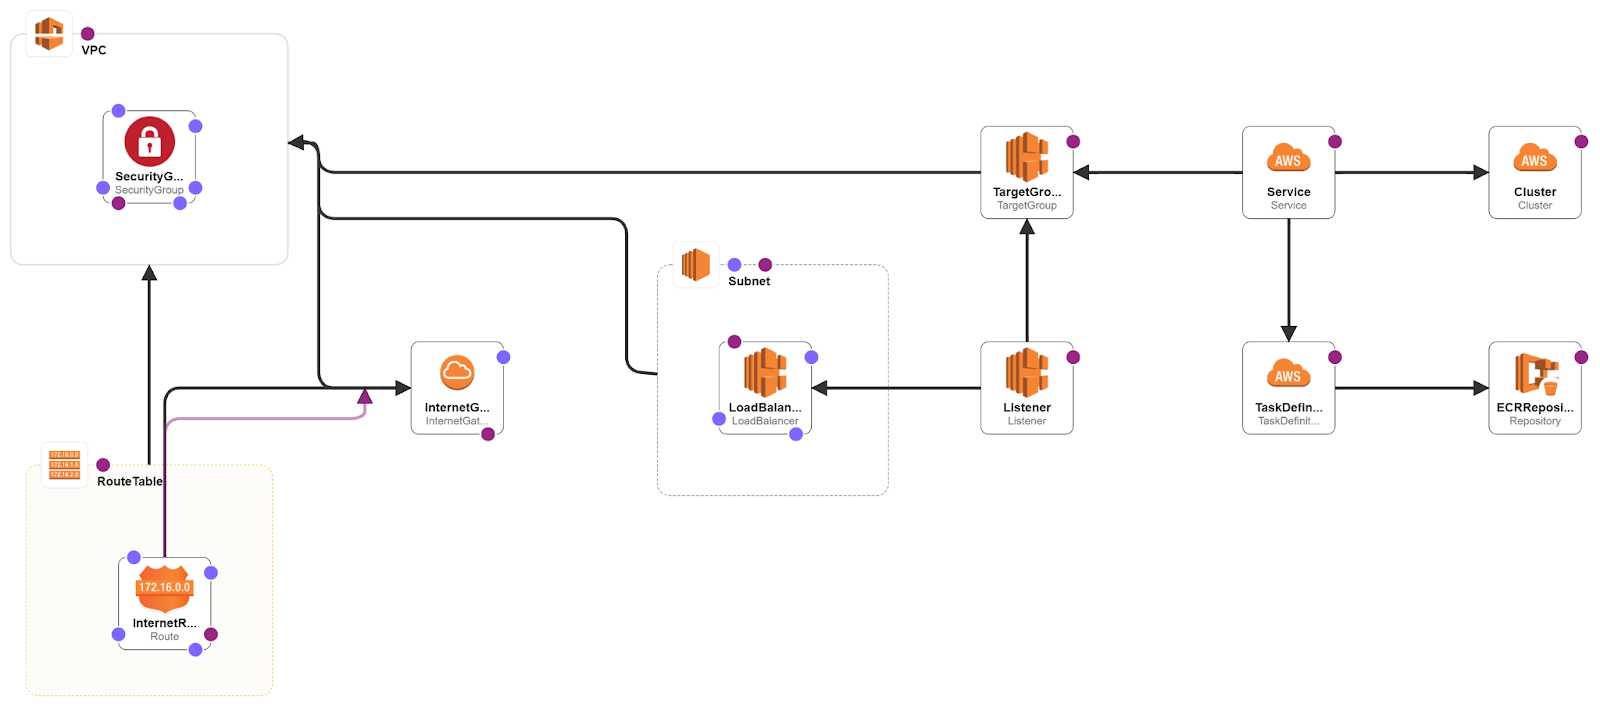
1. This Plan Utilized the AWS Structure Below:
4.1 Clone the repository example: Clone the TODO-List application repository to your local machine using the following command:
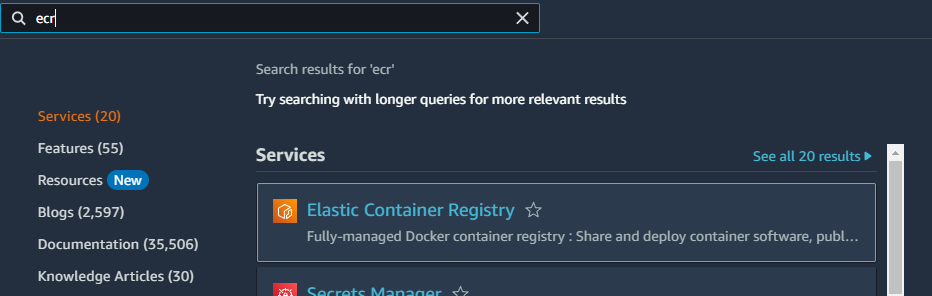
4.1.2 Push the Docker Image to a Container Registry: Open the AWS Management Console and navigate to Amazon Elastic Container Registry (ECR).
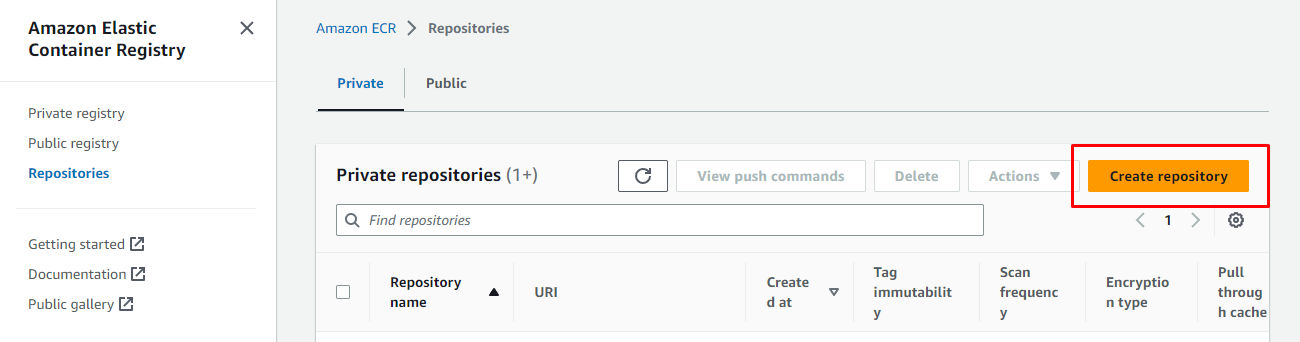
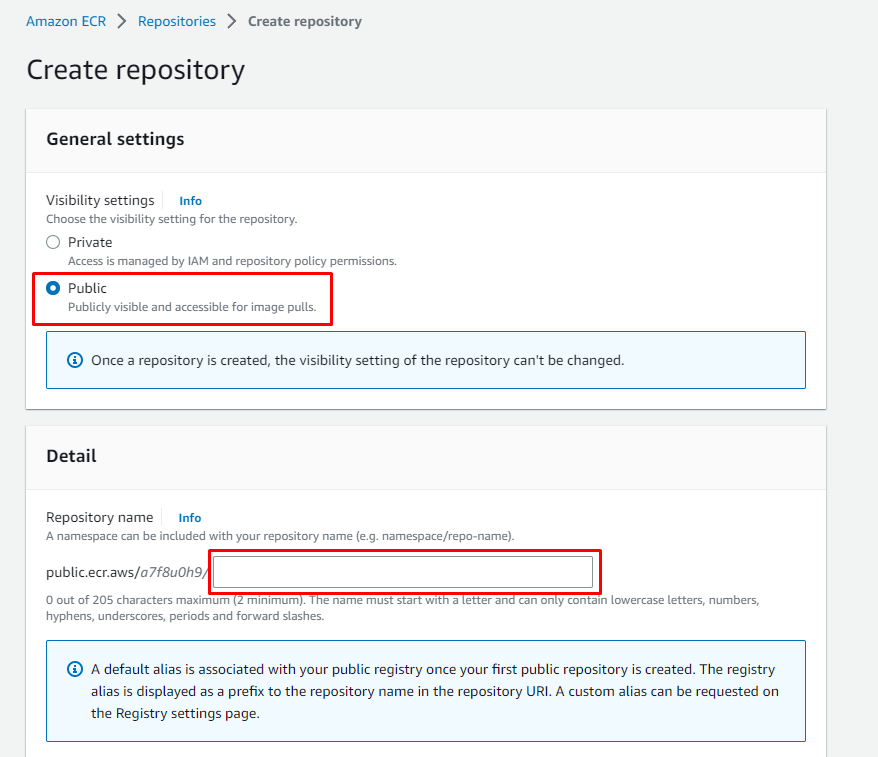
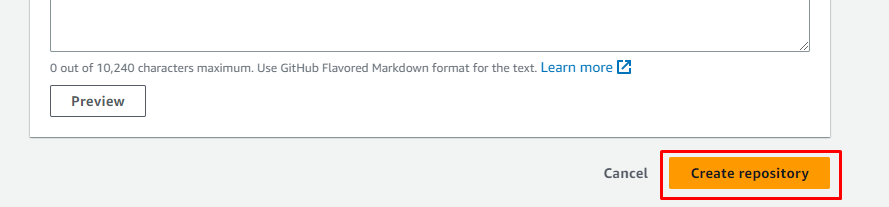
4.1.3 Create a new repository and take note of the ECR repository URI
4.1.4 In your terminal, authenticate the Docker CLI to the ECR registry by running the following command:
4.1.4.1 Retrieve an authentication token and authenticate your Docker client to your registry. Use the AWS CLI:
Note: If you receive an error using the AWS CLI, make sure that you have the latest version of the AWS CLI and Docker installed.
4.1.5 Build your Docker image using the following command:
4.1.6 After the build completes, tag your image so that you can push the image to this repository:
4.1.7 Run the following command to push this image to your newly created AWS repository:
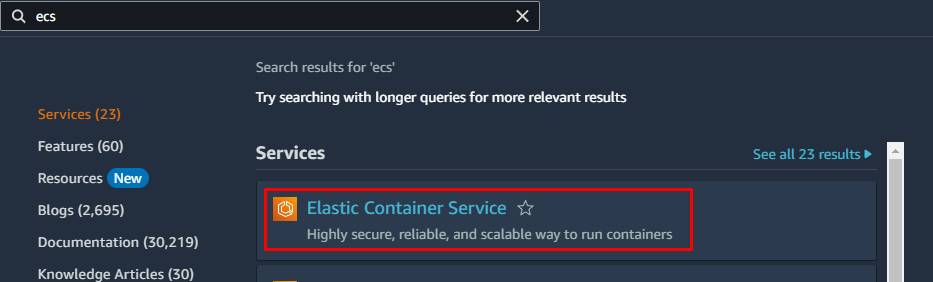
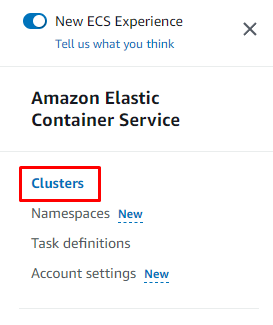
4.2 Create an ECS Task Definition: Open the AWS Management Console and navigate to Amazon ECS.
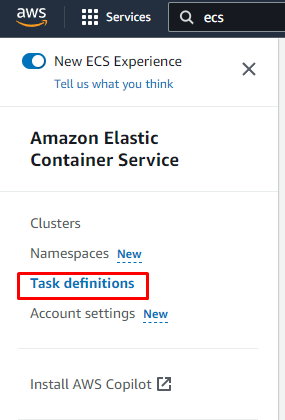
4.2.1 Create a new ECS Task Definition: Fill in the required fields, such as the Task Definition name, Task Role, and Network Mode. Specify the container definitions, including the name, image, and resource requirements. Set environment variables, container port mappings, and any necessary volume configurations.
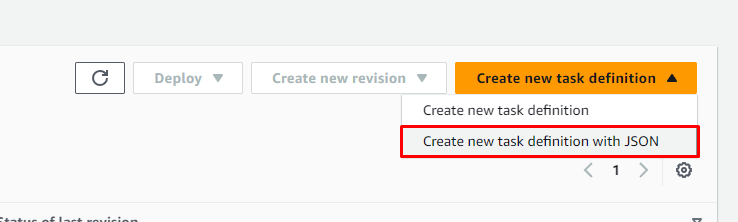
4.2.2 In this case, copy and paste this JSON

4.3 Create an ECS Cluster: In the AWS Management Console, navigate to Amazon ECS and click on "Create cluster."
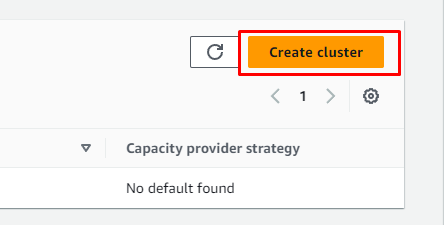
Choose the cluster type, such as EC2 or Fargate. Configure the cluster details, such as the cluster name, networking options, and security group settings.


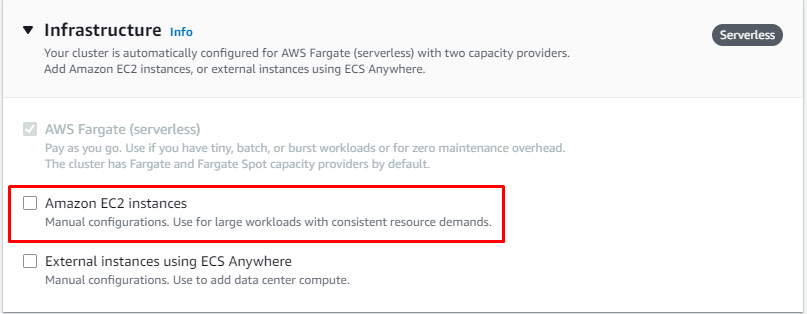
Choose the desired launch type and capacity provider. If using EC2, define the EC2 instance type and key pair settings.

Amazon Linux 2 - t3.small - Desired Capacity Minimum 1


Give it a few minutes to create cluster:

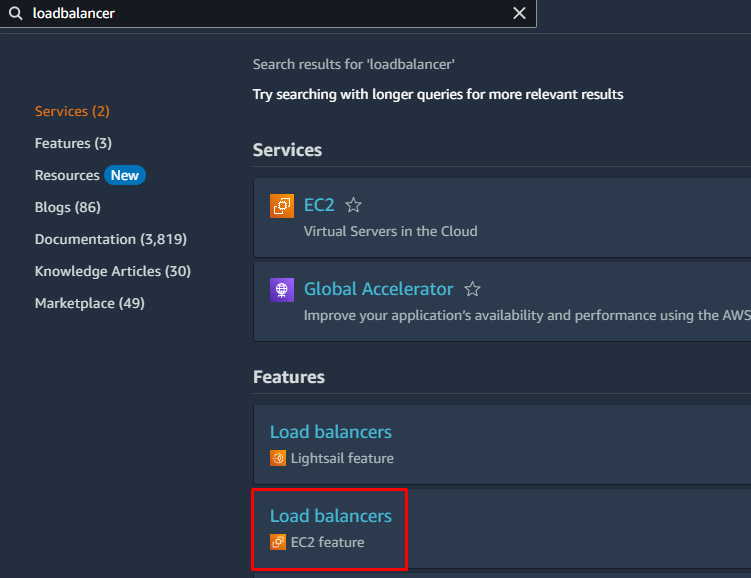
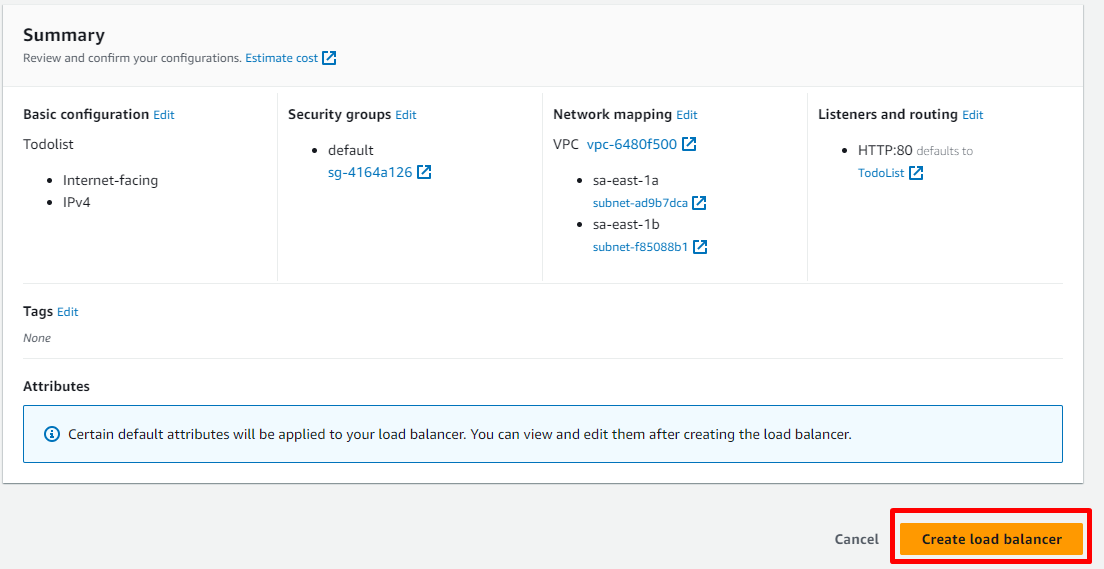
4.4 Configure a Load Balancer: In the AWS Management Console, navigate to Amazon EC2 and click on "Load Balancers." Create a new Application Load Balancer (ALB). Configure the listener and target group to route traffic to the AWS ECS service. Specify the ALB's port, protocol, health check settings, and target type. Select the appropriate VPC, subnets, and security groups for the ALB.


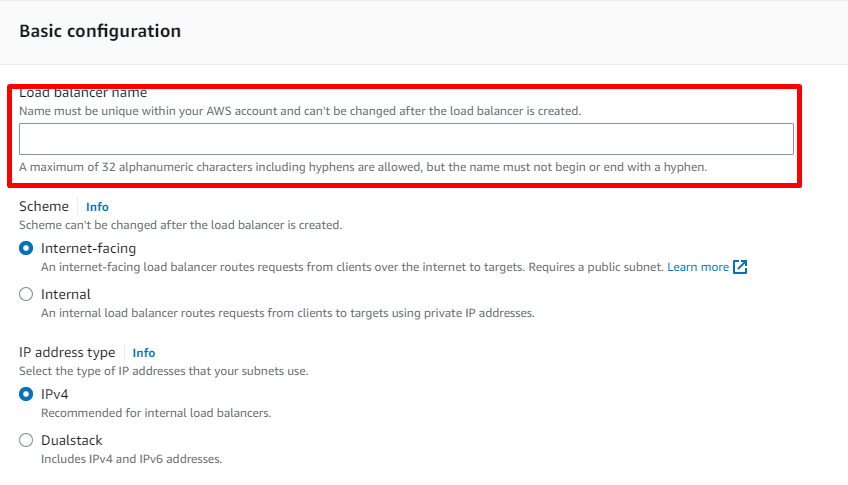
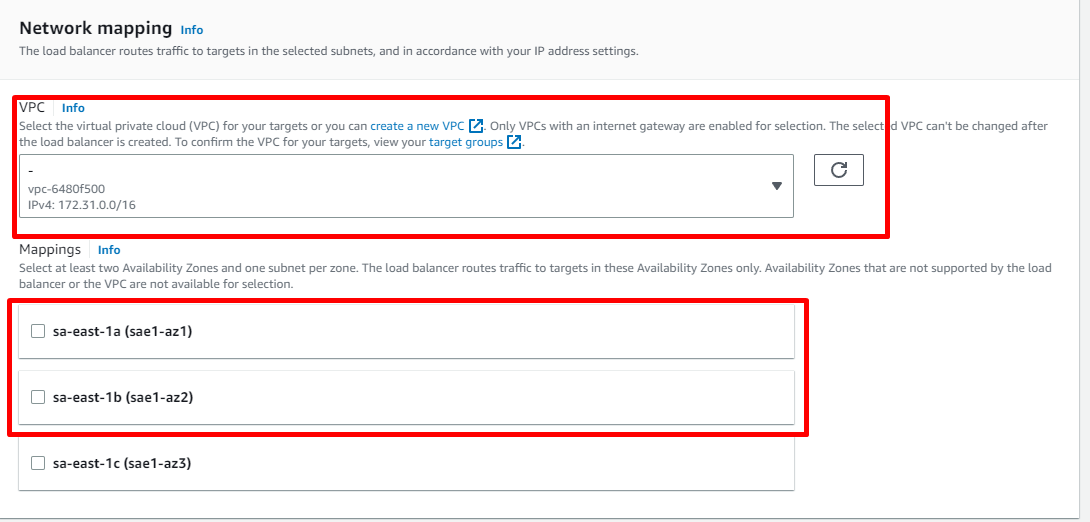
Remember to select where your regions work.
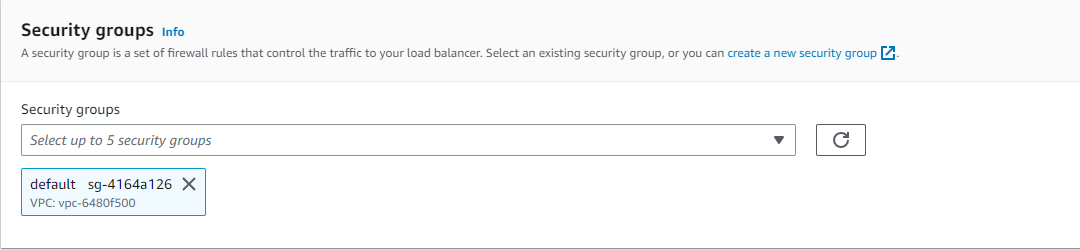
Define your security settings for the access port;

It is not necessary to create a target group here.
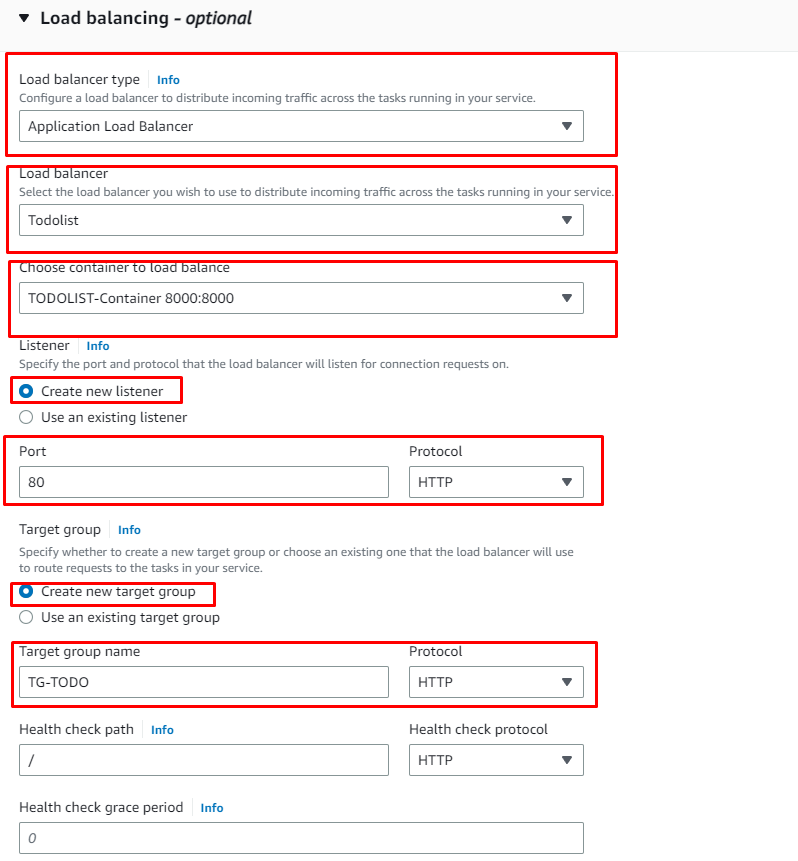
4.5 Create an ECS Service: In the AWS Management Console, navigate to Amazon ECS and click on "Create service." Once that’s done, choose the launch type and task definition created in the previous steps. Configure the service name, desired number of tasks, and deployment settings. Select the cluster and choose the ALB as the load balancer for the service. Configure the service auto-scaling, if desired.

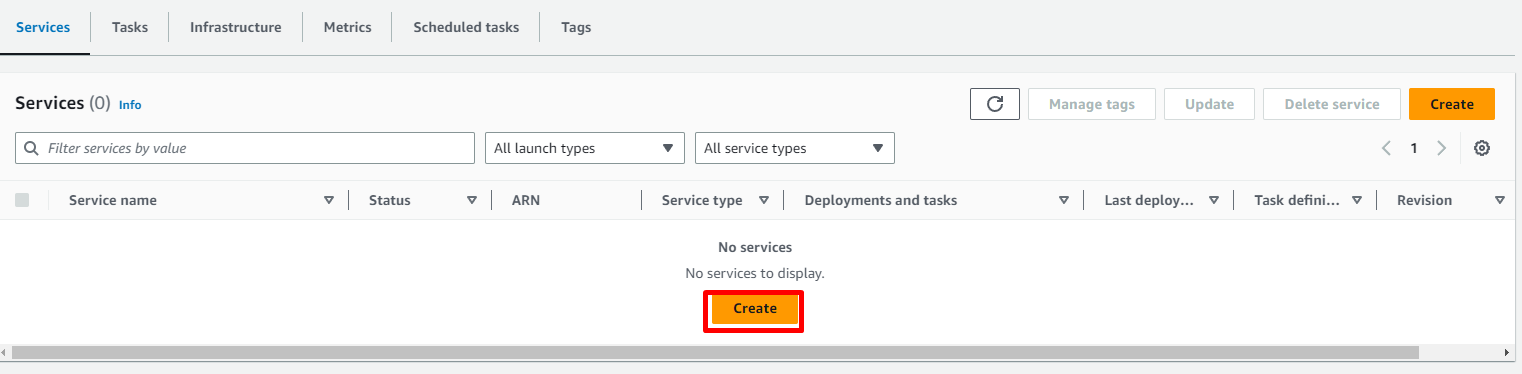

After a few minutes create the service:

Deploy the Django Application: To deploy the Django application, you can choose one of the following methods:
Option 1: Update the Docker image tag in the Task Definition to use the latest version of the image in the ECR repository. ECS will automatically deploy the updated version of the application.
Option 2: Use a CI/CD pipeline tool like AWS CodePipeline to automate the deployment process. Configure the pipeline to build the Docker image, push it to ECR, and update the ECS service with the new Task Definition.
To use this workflow, create a file named build-push.yml in the .github/workflows/ directory of your repository, and paste the code below. Then commit and push this file to trigger the workflow.
Make sure to replace the following placeholders with your own values:
<AWS region>: Replace with the desired AWS region, such as us-east-1.
<ECR repository>: Replace with the name of your ECR repository.
<AWS_ACCOUNT_ID>: Replace with your AWS account ID.
Before running the workflow, you need to set up the following secrets in your GitHub repository settings:
AWS_ACCESS_KEY_ID: The AWS access key ID with permissions to access the ECR repository.
AWS_SECRET_ACCESS_KEY: The AWS secret access key corresponding to the access key ID.
Ensure that the IAM user or role associated with the access key has the necessary permissions to perform the ECR-related actions.
This workflow will be triggered whenever a push is made to the main branch. It will build the Docker image, tag it with the latest commit SHA, and push it to the specified ECR repository.
To test your service look for the URI here if all configuration is OK;
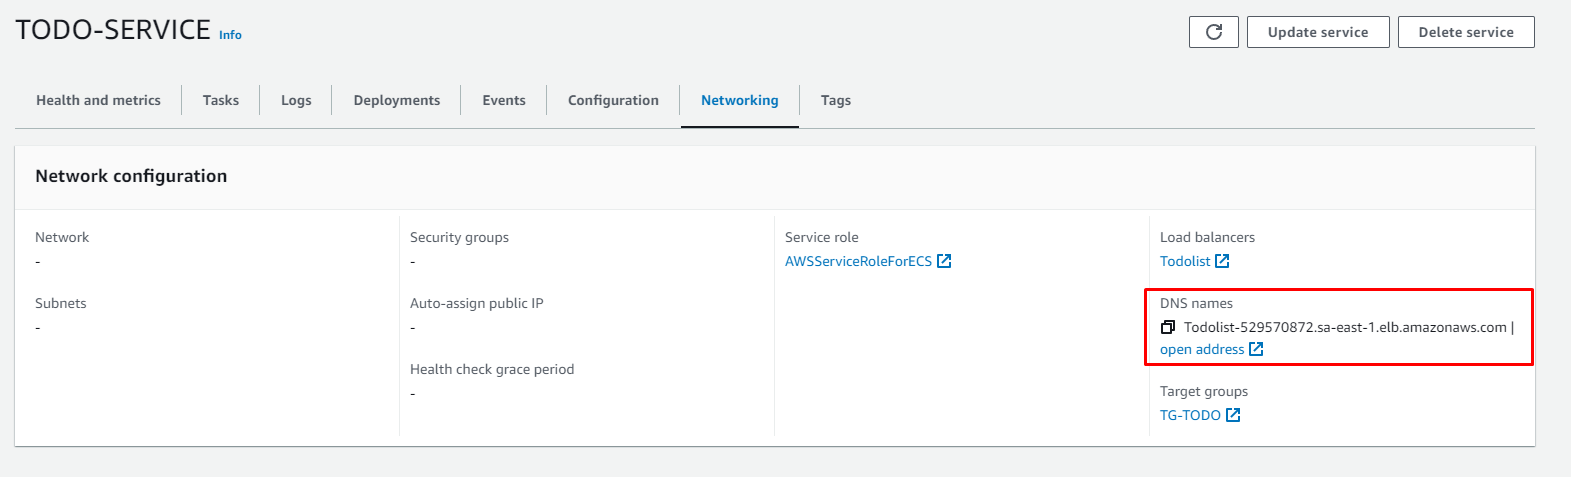
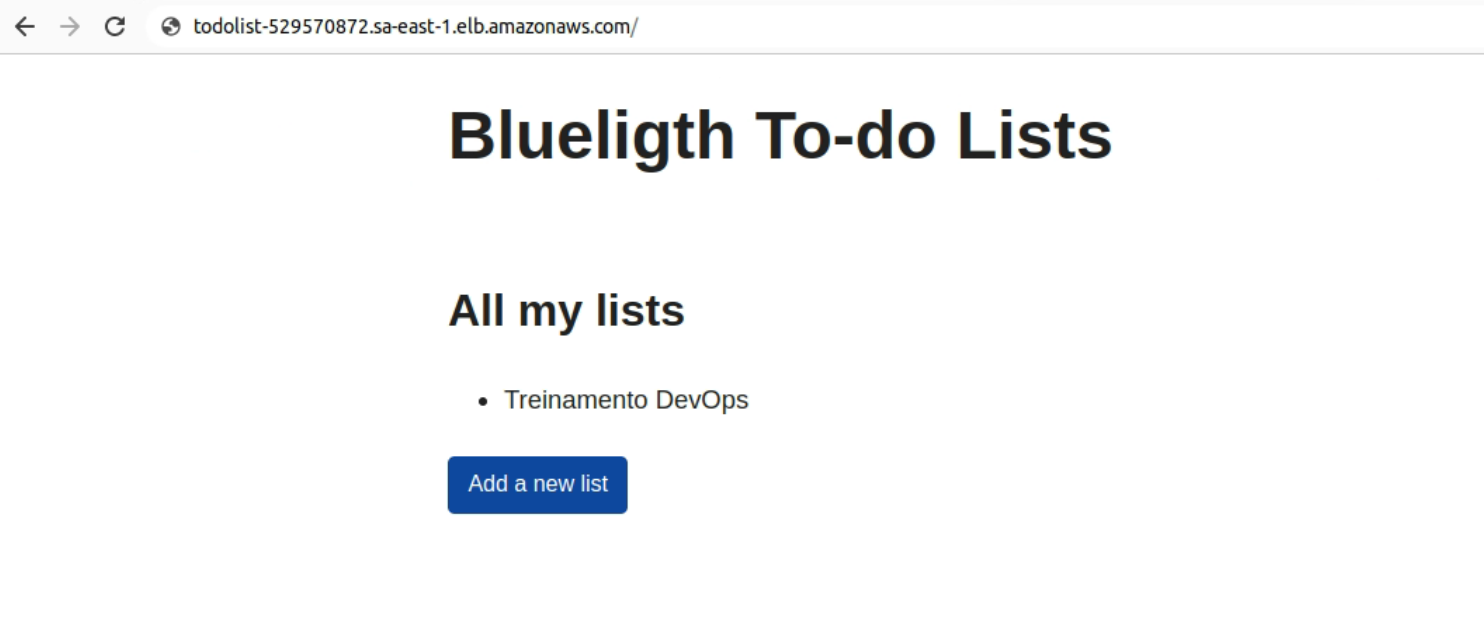
NOTE: This URI and the result of this single example, will change to your account.
Monitor and Scale: In the AWS Management Console, navigate to Amazon (AWS) CloudWatch to monitor your ECS service. Set up alarms and notifications based on specific metrics to ensure your application is running smoothly. Additionally, configure auto-scaling policies to automatically scale the ECS service based on demand.
There are ways to do all these steps in an automated way with Infrastructure as Code (IaC) practices and tools, but that is a topic for our next post.
AWS ECS Benefits and Comparison with Other Container Orchestration Tools
Benefits
AWS ECS (Elastic Container Service) is a highly scalable, high-performance container orchestration service that supports Docker containers and allows you to easily run applications on a managed cluster of Amazon EC2 instances. It has several benefits, which include:
1.1 Integrated with AWS Ecosystem: As a native AWS service, ECS is deeply integrated with other AWS services like IAM for security, ELB for load balancing, ECR for Docker image repository, CloudWatch for logs, etc. This seamless integration greatly simplifies the management of containerized applications.
1.2 Managed Service: ECS eliminates the need to install, operate, and scale your own container orchestration platform. This allows you to focus on building and running applications instead of managing infrastructure.
1.3 Scalability: ECS allows you to easily scale up or down to meet the requirements of your application. It supports both service-level and cluster-level auto-scaling.
1.4 Security: ECS integrates with AWS IAM, providing robust and flexible access control for your applications. It also supports private networking for increased isolation.
1.5 Cost Efficiency: With Fargate, a serverless compute engine for containers, you only pay for the resources that your applications actually use.
1.6 Flexible Scheduling: ECS supports several scheduling strategies, including capacity providers, which enables you to use both on-demand and spot instances simultaneously.
1.7 Microservices Architecture: ECS simplifies running applications in a microservices architecture due to its service discovery and load-balancing capabilities.
1.8 Continuous Deployment: ECS supports blue/green deployments using AWS CodeDeploy, which helps you to minimize downtime during application updates.
Comparison
In the table above, each feature is given a score from 1 to 10, with 10 being the highest rating for ease of use. Scores are based on the perceived benefits of each solution in that specific capability area.
Conclusion
With the help of this comprehensive guide, you will be able to effectively run containers on AWS ECS. From setting up an ECS cluster to leveraging advanced features and best practices, you now have the tools and knowledge to build scalable, reliable, and highly available containerized applications on AWS.
Remember, AWS ECS offers a robust container orchestration platform, allowing you to focus on your application logic while leaving the infrastructure management to AWS. Embrace the power of containers and let AWS ECS simplify your journey into the world of cloud-native architecture.
You may also be interested in:
Testing Code: Types and Benefits for Software Development
Top Tips for Successful Nearshore Software Development
AWS vs Azure: Which is Better for Cloud Computing
Best DevOps Certifications: The Complete Guide for 2023
Nearshore Software Development Rates: The Complete Guide for 2023
More cost-effective than hiring in-house, with Nearshore Boost, our nearshore software development service, you can ensure your business stays competitive with an expanded team and a bigger global presence, you can be flexible as you respond to your customers’ needs.
Learn more about our services by booking a free consultation with us today!


