
ArgoCD is a GitOps Continuous Delivery tool for Kubernetes. It automates the deployment of desired application states to target environments. The main idea of GitOps is having declarative descriptions of the desired state of production in a Git repository like source code and an automated process to match these desired and current states of production. It allows developers to push commits to the repository whenever they make deployment to the production environment while the automated system handles everything else.
This is where ArgoCD comes into the picture. It completes the most crucial step of GitOps by ensuring that the repository and production environment states are always in sync. Furthermore, it reports & visualizes any deviation and provides mechanisms to automatically or manually sync the live state to the desired target state.
Table of Contents
What are the Core Features of ArgoCD?
How to Manage a GitOps Flow with ArgocCD for your Kubernetes Clusters
4. Deploy an application (with manifest)
5.Deploy an application (From a Helm Repository)
What is ArgoCD?
ArgoCD is a GitOps tool that helps with your GitOps workflows. It reads your environment configuration from your git repository and applies it to your Kubernetes clusters. ArgoCD can be used as a standalone tool or as part of your CI/CD workflow.
What is GitOps?
GitOps is an operational setup that adopts DevOps’ best practices to manage infrastructure and configurations using Git. Git is an open-source version control system. Primarily, GitOps involves using Git pull requests to manage infrastructure provisioning and deployment automatically.
Learn more about what it entails in our blog post; What is GitOps: A Detailed Overview.
What are the Core Features of ArgoCD?
Some of ArgoCD’s best features are:
- It allows declarative and version-controlled application deployments
- It enables automated deployment of applications to specified target environments or multiple Kubernetes clusters
- It supports Kustomize, Helm application declarations, or even plain directory of YAML/JSON manifests
- Its Web UI provides a real-time view of application activity
- It facilitates Rollback/Roll-anywhere to any application configuration committed in the Git repository
How to Manage a GitOps Flow with ArgocCD for your Kubernetes Clusters
There's one requirement to run ArgoCD. As you might have guessed, you need to have a running Kubernetes cluster. In this blog post, I will be using minikube. The main steps are:
1. Install Argo CD
This creates a new namespace called ArgoCD, where ArgoCD’s services and application resources will live.
The command above will install Argo CD in your Kubernetes cluster.
We won't cover it in this post, but you can install ArgoCD in a HA setup. It will run more containers and run Redis in HA Mode. It also requires you to have at least three different nodes due to pod anti-affinity roles in the specs.
2. Access Argo CD API Server
The Argo CD API server is not exposed to an external IP by default. To access it, you can use a port forwarding with kubectl.

As shown in the image, now you can access the API Server.
The default username is admin.
An initial password is autogenerated to be the pod name of the ArgoCD API server. You can retrieve the initial password with the command below:
3. Set up ArgoCD
Before you start deploying applications, there are a few things you should set up.
Click on the gear icon, which will take you to the settings of ArgoCD as shown in this image.
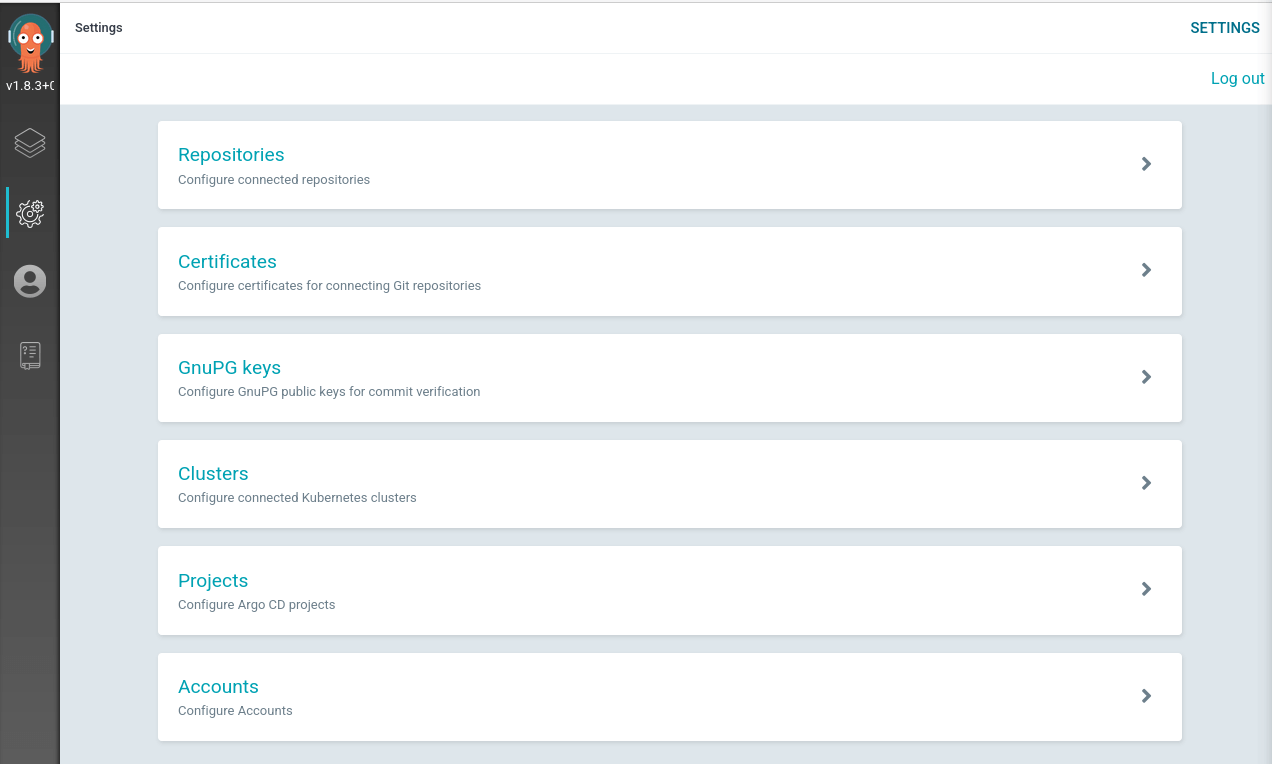
The next step is to open Repositories. Finally, you need to add your own git repository using HTTPS.
There is no need to fill up a username or password since it is a public repository.
Note: If this were a private repository, you would be required to use an access token from your Git Hosting service, leave the username blank, and enter the access token in the password field.
Once you are done, press Connect.
You can verify it was added successfully by looking at the connection status.

Clusters: Here, you can find your existing cluster. If you want to add another cluster as version 1.83, the WebUI doesn't allow you to do that. Instead, you need to use ArgoCD CLI.
4. Deploy an Application (with Manifest)
This is where things get interesting. You can deploy your application in two different ways (in our case this application would be Grafana)
To start with the traditional way of deploying an application to a Kubernetes cluster, get Grafana up and running with the following manifest.
Usually, you'll be running your kubectl apply -f command, but ArgoCD will do that for you in this case.
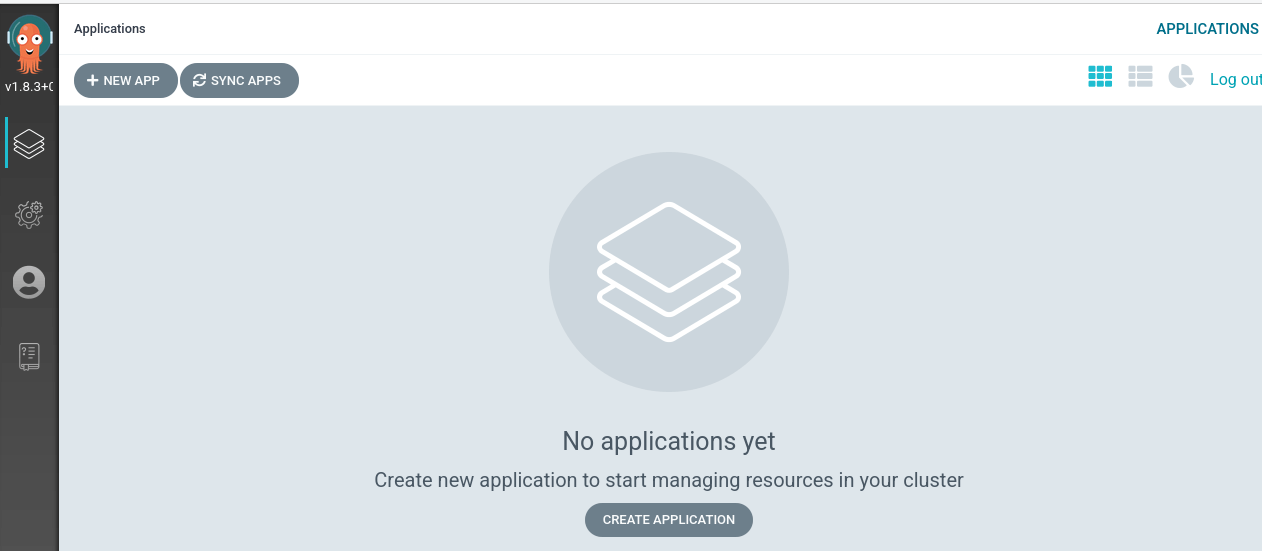
Click on the Application icon on the left side menu and select create application.
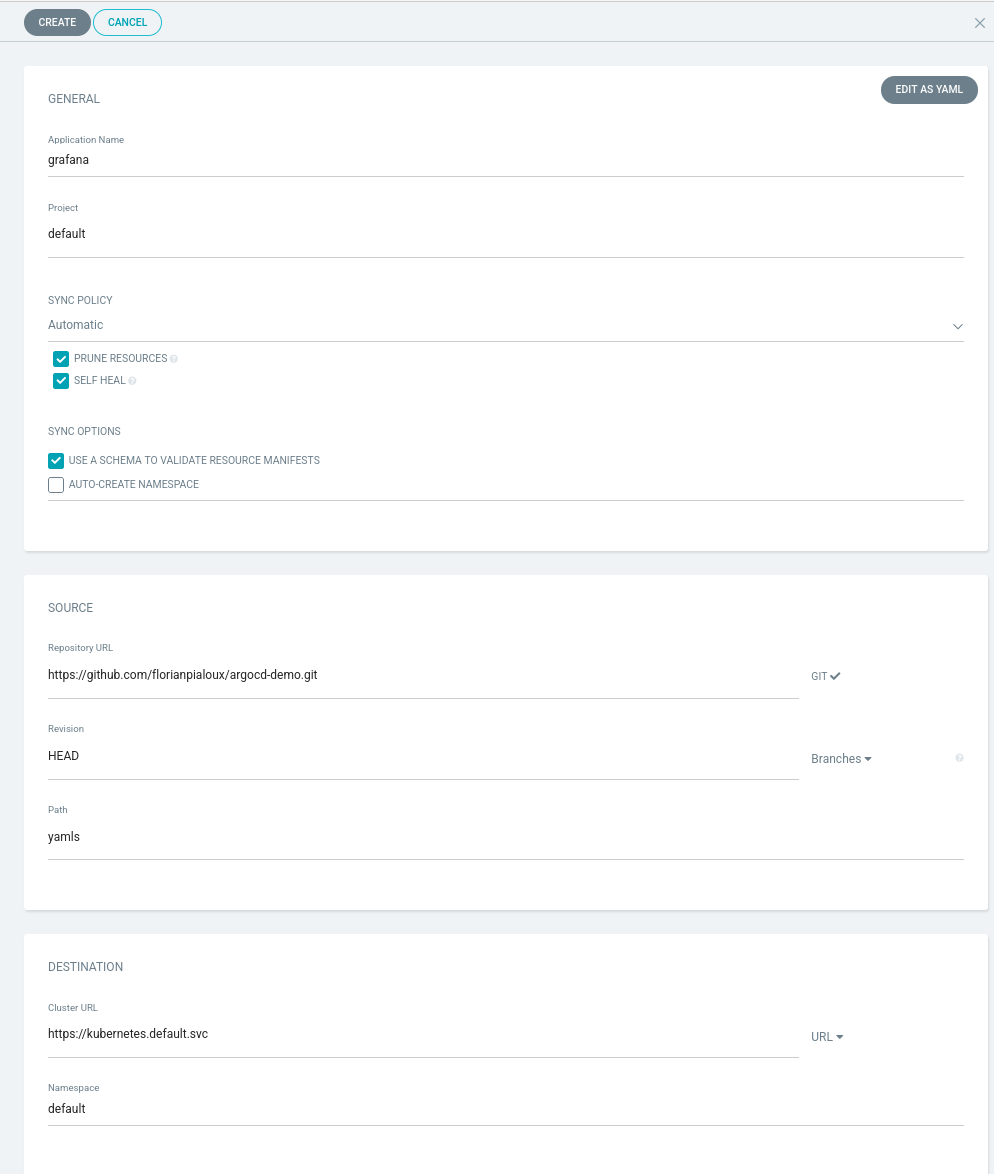
Define a name, point your application to its source. In our case, you will have the repository we linked earlier auto-populated when you select a Repository URL. Make sure that you define the path for these manifest files.
A few points that we should highlight:
- Sync Policy: By default, it is set to Manual. Once you set it to Automatic, you will unlock two more advanced options:
- Prune resources; If checked, ArgoCD will delete resources if they are no longer defined in your Git repository;
- Self-heal: If checked, ArgoCD will force the state defined in Git into the cluster when a deviation in the cluster is detected.
Click on Create, and within a few seconds, ArgoCD will spin up your application that you defined with the manifest files:
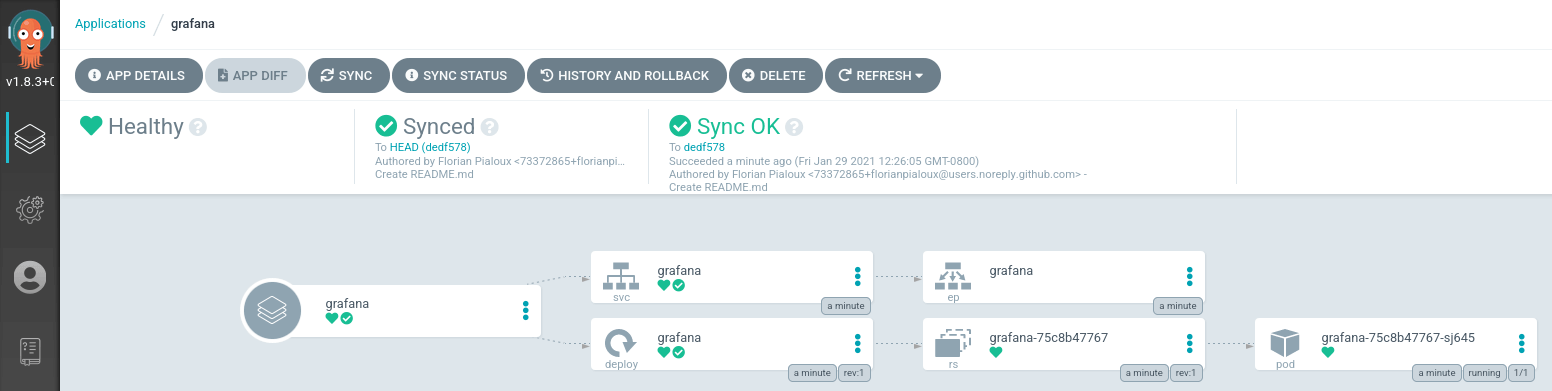
At this stage, you should be able to browse Grafana with the node port defined here.

If you need to make some modifications to the manifest files, you will simply modify the .yaml file, and ArgoCD will sync the deployment with the latest changes committed and pushed to the git repository.
If you try to increase the replica from 1 to 2, it should trigger ArgoCD to create a secondary pod to run Grafana.
- Modify L8 of grafana-deployment.yaml
Next, commit and push your change. ArgoCD will sync the application with this latest change you made, and a new pod will get created within a minute.
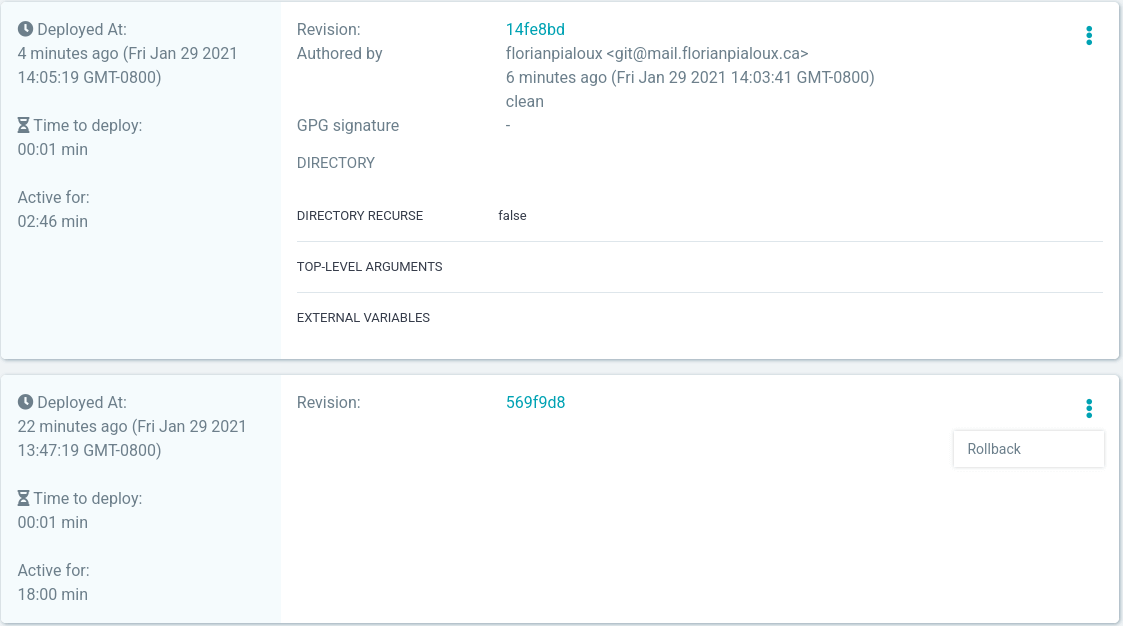
In our case, In the sync status, you can see that the application is running based on the latest commit ID 14fe8bd.
Unhappy with this change? Let's roll back. Hit the History and Rollback button on your application, select the previous commit ID, and hit Rollback.
You will receive the following warning as we have Auto-Sync enable:

The secondary pod will get deleted because the previous commit had a replica set to 1, and you can see that our status changed to OutOfSync.

You can re-enable Auto-Sync at any time if you click on App Details.
The events tab on App Details is also a nice feature to view the logs on what happened to our application.

5. Deploy an Application (from a Helm Repository)
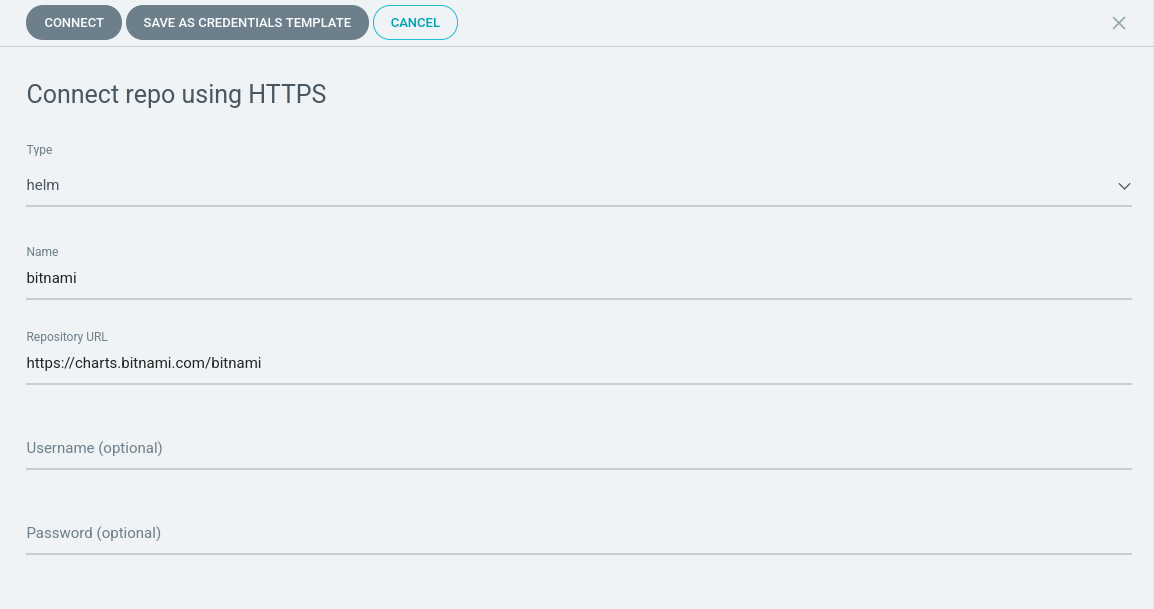
You will need to add a Helm Repository, which is a very similar process as we did earlier with the Git repository.
Head to the Settings -> Repositories
Simply change the type from Git to Helm. I am going to use the Bitnami Helm repository in the following example:
Once this is done, create a new application. In our case, we will call it grafana-helm.
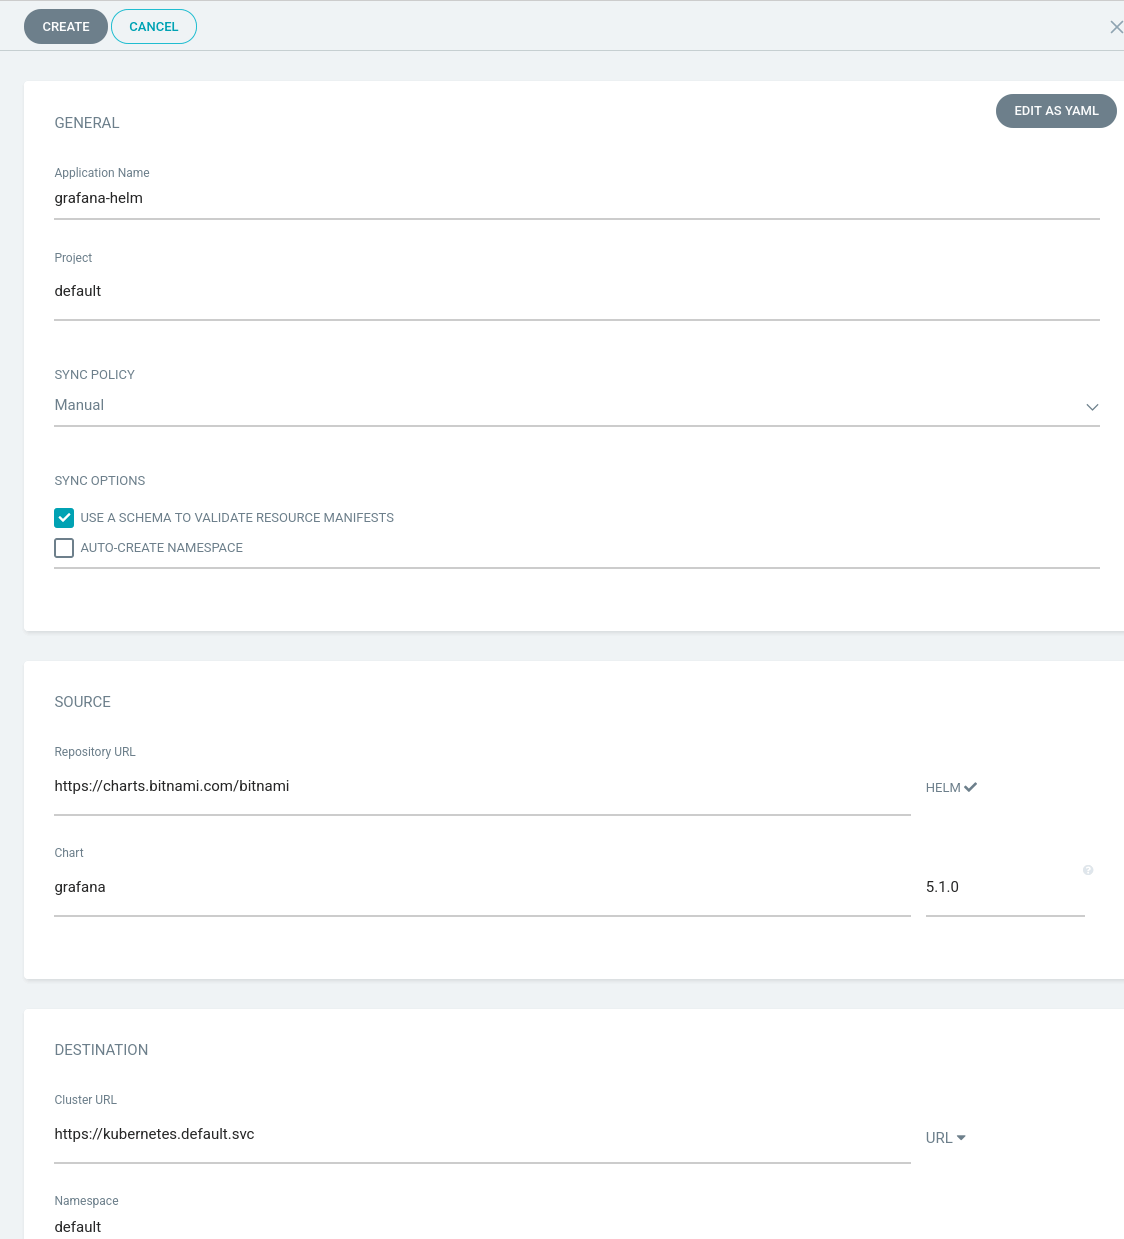
If you click on the chart, you can select any Helm Charts that Bitnami has available on their repository. In this case, we will stick with Grafana.
This Grafana deployment through a Helm Chart doesn't get the pod exposed via an External IP. Therefore, you will have to make some modifications to this Helm Chart, click on App Details, and head over to Parameters:
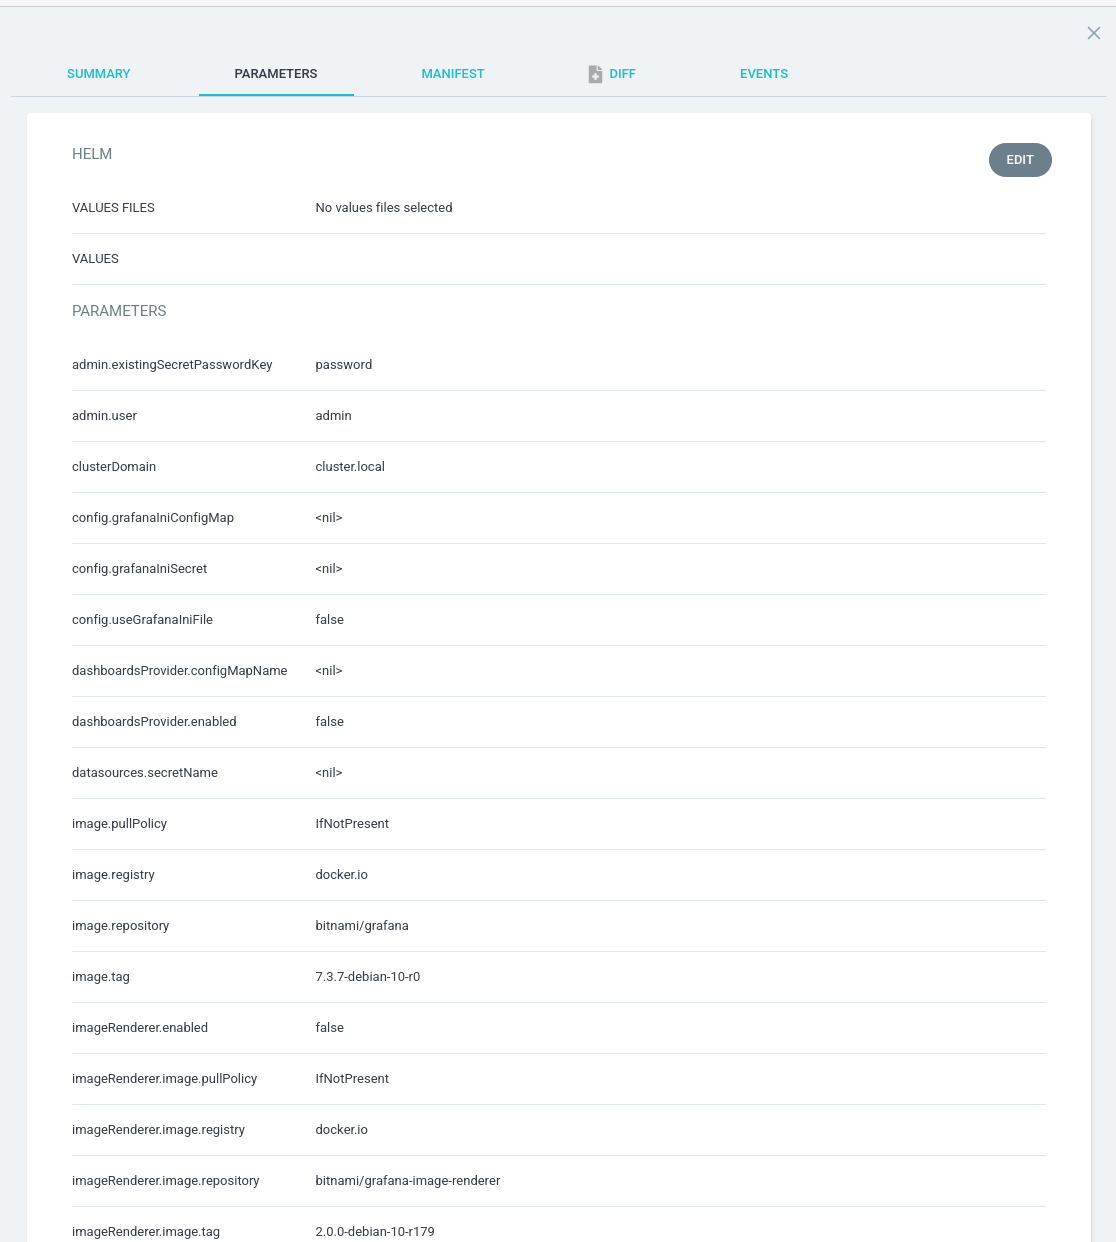
This is where you want to modify your Helm Values. If you'd like a detailed overview of all those Helm Values, you can find more information here: the Bitnami repo.
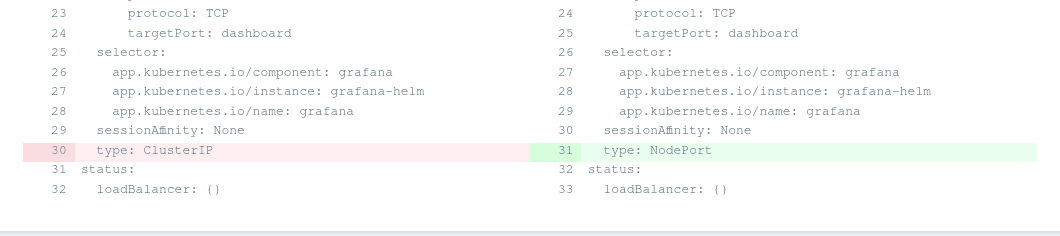
Let's change the service.type from ClusterIP to NodePort.
Our application is going to be out of sync. You can verify this change by checking App Diff.
Now it's time to sync our changes. Go ahead and click on the Sync button.
Everything seems healthy now. You can verify the nodeport got applied on our service by running a kubectl command:
Brilliant, now we know our node port will be 30055, and Grafana can be reached by browsing http://IP:30055/
If Bitnami releases a new version for that Helm Chart, you can easily change the version by changing the chart version, which will cause your application to go out of sync, and you will need to sync it again.
Conclusion
The main advantages of GitOps flow are to deploy faster and more often. ArgoCD helps with that by adopting those techniques. Thanks to its friendly web UI, it also gives an excellent visualization over Kubernetes resources.
You May Also Be Interested In:
DevOps Engineer Salary: GCP Guide for 2021
Kubernetes Salary Guide: A Detailed Comparison
Best Infrastructure as Code Tools (IaC): The Top 10 for 2022
What is GitOps: A Detailed Overview
Best Azure Certification Courses: The Top 16 You Need to Know
More cost-effective than hiring in-house, with Nearshore Boost, our nearshore software development service, you can ensure your business stays competitive with an expanded team and a bigger global presence, you can be flexible as you respond to your customers’ needs.
Learn more about our services by booking a free consultation with us today!


